First up in my December challenge to transform my house? The banister. Part of what sold me on this house was how the staircase is so open; it makes the front entryway so light and airy to be able to see up to the second floor loft. But I wasn’t in love with the banister itself.

The first DIY project I took on was replacing all the brass doorknobs/fixtures that dated the house back to the 90s. But once that was done, I still felt like the orange-y oak banister was a 90s throwback, and it felt a lot more casual than the style I wanted. I learned from others in the neighborhood that getting a professional to restain my banisters would be upwards of $1,000 (EEK!), but I also found lots of tutorials from bloggers who had successfully restained their banisters with something called “gel stain”. Gel stain supposedly doesn’t require you to sand all the way down to the bare wood… though I mostly did anyway, because there was some pretty thick lacquer on top. And it turned out beautiful! I’m so happy with the end result, and I wanted to share how exactly I did it and some of the tricks I learned along the way.
First: the sanding. The other bloggers whose posts I read mostly just scuffed up the surface rather than sanding completely (here are two of the most helpful: one by Kelly, and one by Ashley). However, my banister had a really thick lacquer coating, and it was chipped away a lot in places. At first I started sanding just to try to remove the imperfections, but I ended up taking it all the way down to the bare wood just about everywhere – and I think that allowed for my finish to show the grain and look more natural, rather than painted on.
But sanding takes a really long time. I started sanding this summer, when Adam was here, and I would only tolerate doing 20 minutes or so at a time before my hands would get sore, my throat would get dusty (even though we were wearing masks), and I’d want to give up. I kept telling myself that it would be a good mindless task for a day when I was working at home on a conference call – but that day never came, and I put it off for months. Finally, I came up with a better solution.
While it would take a ton of money to have someone completely refinish the banister for me, I could outsource just the sanding part of the work pretty easily. My neighborhood has a Facebook group where people post all sorts of questions and announcements, and a lot of high school students post looking for work doing babysitting, raking leaves, mowing the lawn, or doing odd jobs around the house. I hired a kid on there to come over, work diligently for two hours, and finish the whole thing – for only $35! (He wanted $25, I threw in a little extra, and frankly feel bad that I didn’t give him more.) That was the best $35 I have ever spent, not having to do all the sanding myself 🙂
With the worst part of the project now done, I vacuumed and then used a wet rag to wipe up all the dust, let it dry for a day, and then used sticky “tack cloth” to ensure I had gotten every last particle. Next up: taping off where the banister met the walls, and the top of each spindle. I had heard that this part would take a long time, but I started on a flat section at the top of the balcony, and it seemed like it was going to be a piece of cake. I thought I must be some kind of taping savant, until I came to the portion where the banister dipped down the stairs and the spindles now met the banister on a diagonal. This was really hard to tape properly, and now I saw why people said this part took a while! I ended up using a lot of little pieces of tape to overlap and fill in holes, and hoped that my taping would suffice. In all, it took me about 45 minutes to tape everything off.
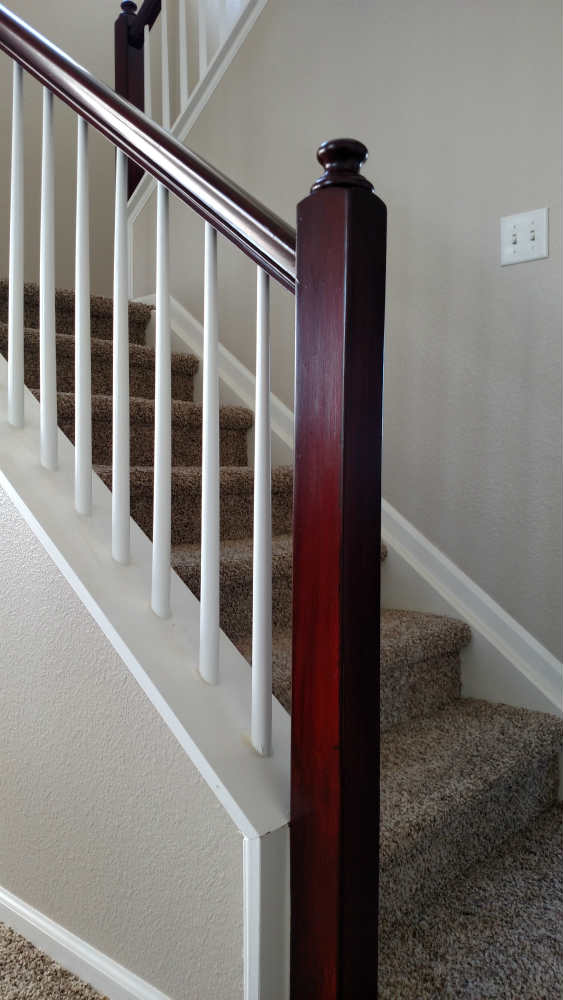
And then it was time to stain! I took the opportunity to clean out my sock drawer of some old pairs that were wearing thin. After pulling on rubber gloves to protect my skin from the color, I donned a sock over my gloved right hand, dipped it into the stain, and started wiping it onto the banister. Again, I started at the top on the flat section, and that one went pretty smoothly – I figured I’d be done in no time. But when I came around the corner and got to the first newel post, it got a lot more complicated.

For one thing, it was hard to reach through/around the spindles to get the far side of the newel post. However, that side would face the front door so I needed it to be a really smooth and even application. Luckily, the gel stain was pretty forgiving as far as streaks went, especially after a few coats! The top newel post was much closer to a spindle than any of the others were, so I accidentally got some gel stain on that super close spindle as I tried to get the inside of the post. But I had a big bottle of mineral spirits nearby at all times, which saved the day. Essentially, mineral spirits are an oil that you can rub onto any mistakes in order to erase them while they’re still wet. I may have had a few of those mistakes 🙂 Even when I accidentally got the dark cherry gel stain on the bright white spindles, though, the mineral spirits erased the stain perfectly.
Another set of trouble spots were the two newel posts that attached directly to the carpeted floor, rather than to a stringer. (What’s a stringer? I learned all about the parts of a staircase over the course of this project.) My carpet was all brand new, having been replaced just before I moved in, and I didn’t know how best to protect it. I ended up not taping it or really protecting it in any way, since the stain wasn’t drippy. When it came time to pain close to the carpet, I used a spatula to hold the carpet down while I took a foam brush and got down to the bottom of the post. I did end up getting a tiny bit of stain on the carpet, but that was more because I wasn’t being careful in my spatula/staining technique; I think this could have been stain-free if I had taken my time or had someone else to help. And anyway, mineral spirits once again came to the rescue – I was able to get most of the stain out of the carpet with that! (My carpet is a mix of cream/brown speckles so it blends in besides.)
It took me about two hours to put the first coat of gel stain on, which I did on a Sunday afternoon. That way, I’d be gone for work for the week and it could dry for a long time, plus, all the fumes would have dissipated by the time I got home (especially since I was running my air purifier nonstop during the week). But coat #2 of the gel stain was a pleasant surprise – it went on in about half the time (one hour), probably because everything already had a base coat so I was missing some smaller spots. It looked gorgeous! After coat #2, there were just a few spots that weren’t perfect, so I went back a day later and touched them up with a third coat in just those places where things were streaky. Staining was done!
The final part was the poly. I checked with the gang over at Home Depot about what kind of poly to use, and they recommended Minwax’s Fast-Drying Oil-Based Poly. I used cheap foam brushes to apply this, and I definitely learned to put on just a little bit at a time. The foam brushes really soaked up the very liquid poly, sometimes creating drips where I didn’t want them (though they were easily wiped up). The foam brushes worked really well for getting the tops of the newel posts fully covered, but I think next time I’d use a rag or something else less porous to finish the main parts of the banister, to help avoid all those excess drips.
It took me about an hour to put on the first coat of poly, which I did on the underside of the banister too. After it had dried for a day, I ran a sheet of sandpaper very lightly over the surface, just to eliminate any bubbles by my not-so-smooth application process, and then followed up with a wipe down with a wet rag/tack cloth. Thanks to one of my bosses at work for this tip! For the second coat of poly, I focused on the top/sides of the banisters and the newel posts – this took me about thirty minutes. And finally, I did a quick third coat just on top of the banister where people would grab it and I wanted some extra durability. I may apply some more coats later if it starts wearing down, but I think I’m all done!
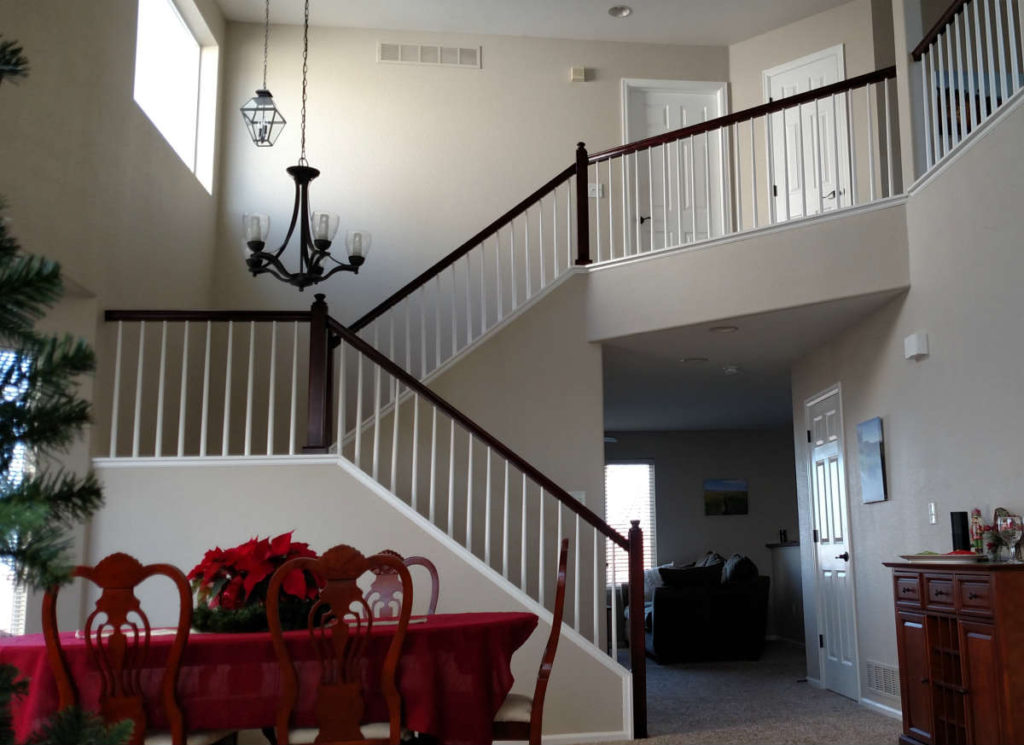
I am so in love with how this came out. I think it makes the whole front of the house look more formal and elegant, and I’m really proud that I managed to do it myself and still have it come out looking nice. My whole goal in doing this now was to be able to wrap my garlands around the finished banister as part of my Christmas decorations… but I’ve been admiring the cherry so much that I haven’t wanted to cover it up yet 🙂
In all, this project took about eight hours of active work: two hours of sanding, one hour of prep, three hours of staining, and two hours of poly. But there was a lot of drying time needed in between, so this isn’t quite the one day project I had been expecting when I first started it. (Did I not mention enough that this was my first foray into DIY?) I tried to do coats of stain/poly just before I was leaving the house for a while, so I could leave the windows open and air out the chemical fumes, but they honestly weren’t too bad anyway, and tended to dissipate within a few hours.
And my all-in cost for this project?
$10 for a pack of medium grit sandpaper
$35 for sanding labor (so worth it)
$8 for a bottle of mineral spirits
$12 for a pint of General Finishes Gel Stain in Georgian Cherry (and a pint was way more than enough; I only used half)
$5 for a pint of Minwax Fast-Drying Poly in Semi-Gloss
$15 in miscellaneous supplies: cheap foam brushes, tack cloth, gloves, masks, and painters’ tape
Total of about $85! Quite a transformation for a pretty low price.
Now, what else can I DIY around the house…
It looks beautiful! Great job!
Thanks, Patty!
Beautiful! I love the color.
Thanks, Lynn!
Looks amazing, and so very well done on your own!!
Thank you, Gianna!
As someone once told me, “you’re so amazing, but sometimes I think that you block yourself from really doing all that you can do.” Often I think that only an ‘expert’ can do such-and-such a job, but who is an expert? What does it take to be an expert?
As a famous country singer once sang (I believe), “There is no limit”. There will be many more crazy DIY projects in your future I am sure. Nice job!
Deana Carter! I love that song, and now I have it stuck in my head 😉
You don’t think I figured that? 🙂